

I know, I know. This post isn’t about travel. This blog is about travel. What gives?
I’m sneaking an interior design entry into a travel blog because the project gets a lot of interest from guests, contractors and friends.
Now that the work is (mostly) complete, I thought I would post some pictures and links. It’s a long tale, but I’ll keep it brief.
And I promise never to post off-topic entries in our blog again. Yeah, right.
Why a steampunk dining room?
Trish and I have always liked the steampunk look, with its strong elements of wood, brass and lighting. And we’re big fans of both steampunk and cyberpunk movies and novels. But the connection goes beyond the aesthetic. We also enjoy steampunk themes that explore the social controversies presented by science, the prospect of a dystopian future and technology fetishism.
We are not, however, into the do-it-yourself culture that some steampunk aficionados adopt. In fact, if you are on a tight budget and/or hate Pottery Barn, stop reading here. We admire the hardcore, but we aren’t purists.
First – a shout-out to another blog. Many of the elements and ideas originated in a long-running and informative website, The Steampunk Home, to whom we owe a big thank you. I can’t remember precisely what drove me to Google ‘steampunk-home-decorating-blog.’ But one day I did and it was very helpful. Lots of good ideas are cataloged there.
The project
We were first moved to redecorate after we had our interior colorfully painted. The results were so surprisingly good that we saw our home in a new light. It inspired us to redecorate our open-floor-plan downstairs into a series of vignettes: a steampunk dining room, a modern naturalist living room and a space-age TV room. We love them all, but the steampunk dining room was, by far, the largest project of the three.

The project was completely unplanned and took the better part of a year. When I say unplanned, I should clarify that I always held an image in my head of what I wanted. But the sequence of added elements was organic and ever-changing. Everything was purchased on the internet. I spent many long, but usually enjoyable hours searching for materials and items. Almost no one uses the term ‘steampunk’ to describe their wares, as that has become cliche.
It wasn’t cheap either. We spent about $10,000 to do it, including some labor, but not including a few pieces of art and decoration reused from other parts of the house.
In the end, we have a dramatic, attention-getting space that excites people when they enter the house. Every evening, when I pass by on my way to bed, the lights glow softly and I smile. It was definitely worth it.
Before, During and After:
Here are a few pictures to show the progression. The first photo is how it used to look when we used the dining area as a living room. The dog is our first Akita, Freida. We apparently have just returned from Costco with cases of soda, lol. To the left of the photo are the bay windows. Directly in front is the old gas fireplace.

Next is a picture during the change from a different angle. It looked like an archeological dig in our home. For orientation, you are facing the bay windows and the the fireplace is on the right (but had been removed).

Here is the original perspective as it looks today, complete with our new Akita, Monty!
")
Our home:
Our house is a recently built neo-Victorian situated in an old neighborhood called Takoma Park outside Washington D.C. There are many Victorian mansions in the area including a period-decorated farmhouse from 1890 next door.

The space:
We’ve always had trouble using the room because of the house’s open floor plan. We call it a ‘room’, but really it’s just one third of a 60 x 20 foot open space that comprises half our main-floor. From the time we moved in, one of our interior design challenges has been to divide that large space into smaller functional ‘rooms’ that were visually distinct even though there were no walls to separate.
After dozens of attempts using multiple arrangements, the large space is now a living room at one end, kids living area in the middle and the steampunk dining room at the other end. I walk through that sequence in the next video starting with the living room space, done in a modern naturalist style. You then pass through the middle section where the kids area has a TV, toy shelves and little couches. The steampunk dining room is at the far end.
The dining room design was particularly difficult, because in addition to the open side, the other three sides of the ‘room’ include a set of bay-windows, a staircase, and (originally) an ugly gas fireplace that we never used. It was impossible to place a sofa without feeling like it was free-floating in the middle of the room. The choice to make that space the dining room (not the original layout for the house) and the decision to get rid of the gas fireplace were critical, tough decisions. Now the dining table fits in the center of the room naturally, and we opened up a wall for the console/mirror that now anchors the room visually.
Furniture:
- Console Table – This table was a great find. It fit perfectly and had an ‘apothecary’ feel.
- Dining Room Table and old chairs are nondescript as intended. We want the eye to go to the walls, where all the ‘stuff’ is.
- Windam Corner Cabinet – discontinued from Crate and Barrel, but a good solution for a corner.
Steampunk is undeniably trendy. It wasn’t that hard to find suitable furniture from the major manufacturers. I knew I wanted some kind of console for displaying items, and a mirror above it. The one we picked has a lot of drawers and isn’t too deep. The dining room table extends larger if we need it. On the near wall, not pictured, we hope to put some kind of settee, but none has yet been purchased – though not for lack of trying. Twice we bought one of these, but it came damaged both times and we gave up.
We considered more stylized furniture from people like Vincent Lehman, but in the end we wanted lighting and decor to drive the visual effect. So we stayed with simpler furniture.
Lighting:
- Overhead Chandelier was the item that began our quest. I saw it on Steampunk Home at the same time my wife saw it in the catalog. We each showed it to the other and a project was born.
- Mad Scientist lights get so much attention although getting the right bulbs has been a challenge.
- Wall Sconces from Steve Erenberg (radio guy). These are unique, but he has others. They are so critical to the look.
- Clamp-light (no link – sold out) from Steve Erenberg with flicker bulb.
 Lighting is the main feature. Everything is done with dim, antique ‘Edison’ bulbs for a glowing, pre-industrial look. I have all but the overhead chandelier on a timer so it pops on for the morning and evening, but is off in daytime and late night. The effect of the lighting is fantastic. Of course in 2012 when, like Europe, the US bans the sale of incandescent light bulbs, we will be in trouble. Here’s hoping a compromise is struck before that date, or else the Creekmores will be stockpiling bulbs. I’m not kidding.

Wallpaper
The decision to go with wallpaper was risky and expensive. It could have gone very badly. And who would have sympathized with us for making a mistake with wallpaper? No one uses wallpaper in homes anymore. When is the last time you noticed wallpaper and said ‘Brilliant!’.
Wallpaper was an essential element of Victorian decorating and I thought the risk might be worth taking as long as the wallpaper was extraordinary. So I searched for custom wallpaper. There are, I discovered, very few artisan wallpaper manufacturers.
But there is one, and it was all I needed. Bradbury and Bradbury out of San Francisco have been supplying period-authentic Victorian wallpaper designs to Bay Areas Victorians for decades.
Trish and I looked at lots of samples, talked with them a little and settled on a suite of prints originally designed by Christian Herter, a New York designer for turn-of-the-century moguls. The Herter Brothers tradition design appealed to us and we picked the jasper green set (left). Wallpaper installation is hard and the materials were pricey, so we trusted only our favorite painter and contractor: Ivan Tokic (301-495-7839) and his crew. (You can see him at work above.) The total for materials and installation were about $4,000, so this was the most expensive single element of our plan.
Decorations:
- Wall mirror from Horchow. This took ages to pick out, and it works brilliantly with the sconces.
- Thermometer: Just a cheap Galileo Thermometer from Amazon.com
- Clock from Roger Wood: He shipped this quickly for a Party we were having. It’s awesome.

- Antique Moroccan Astrolab: This was purchased in Marrakesh on our last trip – 2009. Pictured on the right.
- Birdcage from ebay that took a little repair. We hope to add a miniature human skeleton inside.
- Terrarium (about $65) on a plant stand we bought years ago.
- The rug is from Peshawar, Pakistan purchased on a trip in 2006
- Push-button light-switch wallplate – It’s the little things that make the look.
- Nautical weather station – The nautical theme, from jules Verne, runs deep. Being avid scuba divers, we love it.
- Mounted Megolodon Tooth – A gift to my wife when she worked at the Discovery Channel. It’s huge, probably 6 inches high. We spent a lot to mount it professionally and it’s gorgeous.
- Brass Goggles – from SXSW craft booth.
- Mounted Fossils – Well, these are still unmounted, but we got three fossils in the High Atlas mountains of Morocco and will display them.
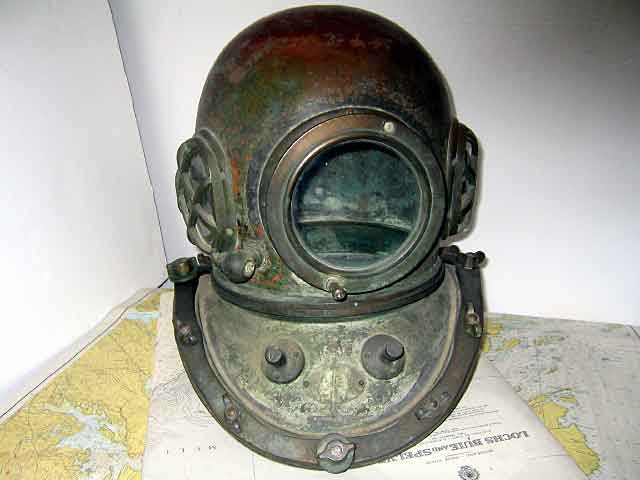
- Diving Helmet – We have not purchased this yet but it’s an essential element. It’ll go on top of the corner cabinet. Antiques are usually over $1000 and replicas are usually shiny brass, which is a no-no.

Decorations are the fun part, because you can’t go wrong. Mixing nautical, scientific, pre-industrial, and mechanical themes is a blast, whether you are bargain-hunting or impulse-buying. The Victorian aesthetic mixes items from the orient; accessable finally to the emerging 19th centyr middle class. We have hand-delivered items from Pakistan, Morocco, and Egypt. But several bits were purchased easily from Amazon and Ebay.
We still have lots of wall space to cover so the fun isn’t going to end soon.

Stuff to come:
It’s still not done, although we have shifted our attention to other projects and areas of the house. But we won’t consider it complete until we place the last pieces of the puzzle.
- Curtains: No Victorian home was considered finished without curtains. We will eventually have them, but they aren’t cheap. We have purple velour curtains picked out from Smith and Noble, but I’m afraid of measuring incorrectly and installation seems like a pain.
- Settee: We still have a wall that needs a settee/love seat. I’m searching ebay, but it’s very hard to find one that we like. Leather, with brass would be best.
- Bookshelves: The library look is essential. I have great Eastlake cast-iron shelve brackets picked out, but I need to find aged or reclaimed wood.
Email us with your thoughts or questions. If you read this far, you must be my mom. Hi mom!
I’m in the middle of doing a search on the contractor, Ivan Tokic, and found your website. Love what you did with your space — congrats!
Would you recommend Tokic?
Hi, Thanks!. This is David and, yes, we would unconditionally recommend him. Ivan has done several jobs for us for the past few years – some major and some minor – and we absolutely love his work.
He’s a craftsman who genuinely loves what he does but he’s also a really fun guy that we trust completely. His teams are always pleasant. I’m not one to exaggerate, but he’s the best contractor we’ve ever worked with.
If you want more info, you can send me an email at Mortrisha at creekmoreworld.com
Thanks much! Again, great concept that really worked out well.
Been following the Steampunk stuff and love the look of your new dining room, very cool!
I think it stinks incandescent bulbs are going to be banned. Guess we’ll need to learn how to make our own…
Thank you! I’m still hoping that they will allow high-efficiency bulbs and/or tax regular incandescents.
Fantastic!!! I adore the hanging lights… do I dare say chandelier? LOL! I’ve notice that Restoration Hardware has been very steampunkish, especially in their lighting, since May of this yera. I love this style… and you’ve done a wonderful job in your own home. WOOT!
love you sonny…
your mother.
AH HA! Thx Mom!
Pingback: notatka 023: Steampunkowy wystrój wn?trz « Blackwood Archives
Hey–one real mom here. Love that wallpaper. Crazy for the chandelier. Everything my parents tried so desperately to get away from. So it goes.
you can make fake Edison bulbs using dead ones ,,,
dissolder and pull the screw base ,
clean off the “cement” , etc
breake the vacume tubeual in the center
(diamond) score the internal neck at base
tension break/pull out neck & the filiments
make replacement neck piece with
an end pinched white opaque plastic tube
line it with reflective tube &
use orange el wire as a “filiment”
or use mono filiment as a coiled light pipe
and an led in the neck
Hi, really great room! If it’s okay with you I’d like use it as a background in a photoshop composite.
Hope to hear from you!
Cheers, Jeroen